By subscribing you agree to with our Privacy Policy
BORING BAR ALIGNMENT PART 1
March 18, 2019
HOW TO PRECISELY AND ACCURATELY ALIGN THE CLIMAX BORING BAR.
The set-up procedure is the most important part of line boring. Improper set-up won’t damage a CLIMAX Line Boring Machine, but it may increase the frequency of repairs needed, leading to additional costs and downtime. Annual repairs may turn into repairs needed every three months.
By simplifying setup and making quick work of tough jobs in spaces too restrictive for most boring machines, CLIMAX’s Line Boring Machines are popular machining solutions for many CLIMAX customers.
An accurate, quality-assured set-up will result in a better, longer-lasting repair job. It’s crucial to make sure to take your time with the set-up process to ensure the bore is as rigid and accurate as possible. We visited with CLIMAX Product Trainer John Savko to learn about best practices for setting up and aligning your boring bar. The following best practice set-up steps apply to the set-up of any type of boring bar but are specifically compatible with CLIMAX Line Boring Machine, including the BB3000, BB4500, and BB5000 line boring machines.
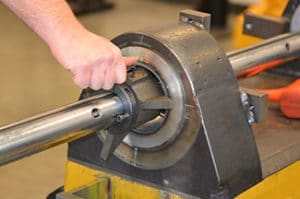
STEP 1:
Use the set-up cones to find the approximate center of the boring bar as it coincides with the bore. The set-up cones help the operator to find the exact center. Next, use the jacking collar to tighten the cones to the bore. Before putting the bearings onto the bar, add the tack blocks to the bearing mounts. Then, find the most sturdy and rigid place to weld them to the work piece. Be sure to mount the bearings onto the farthest points of the bore so that there will be less impact if slight adjustments need to be made. If the bearings are mounted closer to the center, they will be more likely to move and there will be less flexibility available for adjusting them.
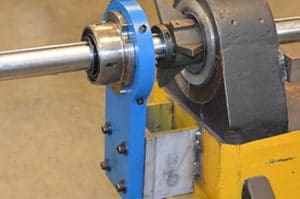
STEP 2:
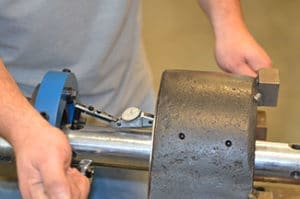
After mounting the bearings to the workpiece, remove the set-up cones and indicate the bore to ensure that the bar is in the center of the hole. The indicator will tell you if the bearing is closer to one side or the other of the bore. Use the four adjusting-set screws to center the bearing. The operator will need to go back and forth a few times to ensure that adjusting one end of the bore does not move the other end. After the bar is in the correct spot, tighten all the bolts. Lastly, recheck that the bar is in the center of the hole with the indicator.
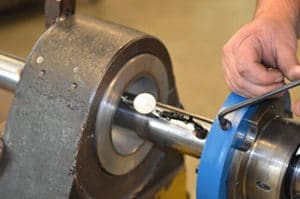
STEP 3:
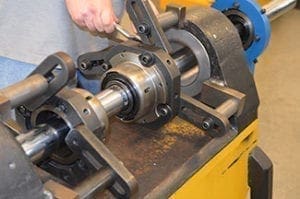
Add the center bearings one at a time and use the “seven times the bar diameter” rule before setting the support bearings. Seven times the bar diameter is the maximum distance you should have from the center of the bearing to the cutting distance. For example, with a 2.25-inch (57.2 mm) bar, you would need to be no more than 15.75 inches (400.1 mm) from the bearing to the cutting tool. The closer to a bearing you can do the machining, the better your results will be. Rigidity is crucial for providing as much support as possible. Make sure that the bearing will rotate freely around the bar (floating the bearing) and that the bar slides freely. Once this step is complete, you’re ready to install the rest of the line boring system!

 Stay tuned for Part 2 on line boring, which will focus on how to properly inspect the bore after you’ve completed your machining job. Many traditional methods require breaking down an entire machine, which can be expensive and inefficient. CLIMAX offers tools to make the inspection process easier and quicker for operators.
Could you use a CLIMAX Line Boring Machine for an upcoming project? Contact a CLIMAX expert today and ask about options for buying or renting this advanced line boring machine.
VIEW BB5000 LINE BORING MACHINE VIDEO >>