By subscribing you agree to with our Privacy Policy
Master Milling Machine Part 1: CLIMAX Linear Gantry Milling Machines
December 1, 2020
 CLIMAX milling machines are designed for quick, easy setup, so with proper attention paid to set up and alignment procedures, your milling machine will be ready to provide precise, versatile on-the-job milling capabilities.
“The LM6200 is a modular beast”- I call it the Lego machine because you can build it into so many different configurations. During setup, take advantage of splitting the bed sections into gantry mode or adding bed sections to machine a long surface with minimal setups,” says John Savko, Product Trainer.
When preparing to mill critical mounting surfaces, a few key steps and checkpoints can help you ensure a successful outcome.
To begin:
-
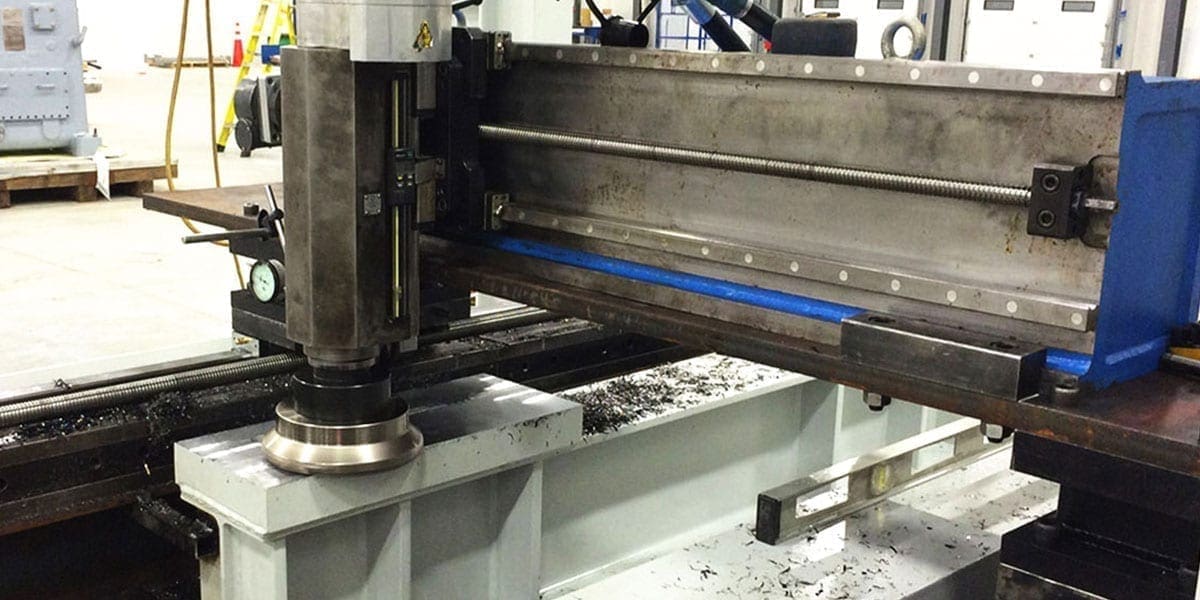
- Establish a solid base for mounting the main bed.
- Align the bed to the piece you want to machine (you can use optics, a laser, a water level, or some other means of alignment).
- Use the screws on the bed to clamp to, or push away from, the workpiece until it is aligned (Image 1).
The bed, now aligned to the workpiece, serves as the foundation for all other alignments, so this foundational alignment must be done correctly. With that accomplished:
-
- Mount the ram to the saddle, and indicate from one-bed rail to the other to make sure it is parallel to (in line with) the bed.
- Establish the milling head assembly perpendicular to the plane the bed is on.
- This assembly is mounted to the Y-Axis cross slide (Image 2).
- Adjust “tram” by using the screws in the milling head assembly (Image 3).

Do you have a question about milling machine set-ups that we didn’t cover here? Or is there another product you would like to learn more about? Contact us today, and our team will get back to you promptly!
Next week: We’ll take a closer look at the milling head assembly and how to get the results you’re looking for as you begin machining with your CLIMAX milling machine.